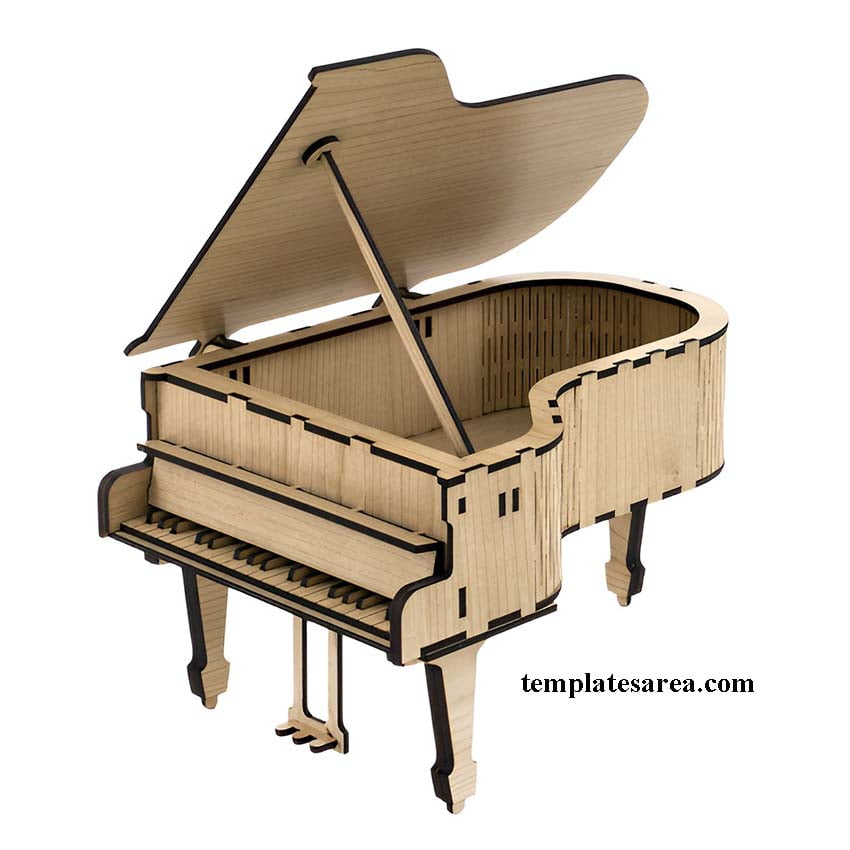
Introducing our free 3D wooden piano laser-cutting project files, compatible with various laser cutters. This model captures the essence of a grand piano in fine detail. It features a hinged lid that you can open and close. Realistically arranged piano keys enhance its authenticity. Once completed, this visually appealing design acts as a unique decoration. Crafted using materials like wood, plywood, MDF, and balsa, commonly used in laser cutters, the piano boasts durability and strength.
This project involves cutting 39 2D pieces from materials with a thickness of 4 mm. These wooden components cut smoothly with laser cutters and fit together effortlessly, thanks to the precision of laser-cutting technology. Once assembled, you’ll possess a lifelike wooden piano model.
We’ve made the project files available for free on this page in CDR, SVG, and DXF laser-cutting file formats. Here’s a quick guide on utilizing the CDR format with laser cutters:
- File Preparation: Open the CDR file in CorelDRAW. Ensure the design is correctly sized and colored for optimal laser cutting and engraving. Typically, a specific color (like black) denotes cutting, while another (like blue) indicates engraving. Refer to your laser cutter’s manual to confirm these color codings.
- Save in the Appropriate Format: While some laser cutters support the CDR format directly, others might require different formats like SVG, DXF, or AI. Determine the format your laser cutter supports and save your file accordingly.
- Transfer to the Laser Cutter: Move your saved file to the laser cutter, usually via a USB drive or network.
- Set Your Laser Parameters: After opening your file in the laser cutter’s software, set the cutting and engraving depths, speed, power, and other laser settings. Consult your cutter’s manual or previous tests to determine the right settings for different materials.
- Perform a Test Cut: When working with a new material or design, it’s wise to conduct a test cut. This ensures proper laser settings and accurate design cuts.
- Initiate the Final Cut: Once everything is set, start the real cutting process.
- Final Checks: After completion, inspect your design for accurate cutting and engraving. If any issues arise, review your settings and retry if necessary.
Remember, each laser cutter model comes with unique features and guidelines. The steps provided serve as a general roadmap, so always refer to your machine’s user manual for precise instructions.
Download Free Laser-Cutting Files for Wooden Piano Model
If you’re eager to craft a 3D wooden model with your CO2 laser cutter, this project is perfect for you. Now, take the first step towards creating this decorative wooden piano model by downloading the suitable laser-cutting file format for free. Don’t miss out on this unique opportunity to showcase your craftsmanship!
| File Type: | DXF, CDR, SVG |
| Category: | CNC Laser Cut Files |
| Tag: | Laser Cut Model Files |
| Features: | Laser Cut File, CAD File, Vector File, Laser Cut Drawing |
| Software: | AutoCAD, Adobe illustrator, CorelDRAW, Inkscape |
| Uploaded by: | Chukwudi Okonkwo |
| Licence: | CC BY-NC-SA 4.0 |
| Design Code: | 30922-10L |

